Drill Down/Change Report
When viewing a time-series or aggregation flow report, you can drill-down to provide in-depth analysis of a particular flow in the report or change the flow report without changing the report configuration options. If you would like to drill down to see details on a particular entry, click on the desired flow, right-click and choose a drill down option.
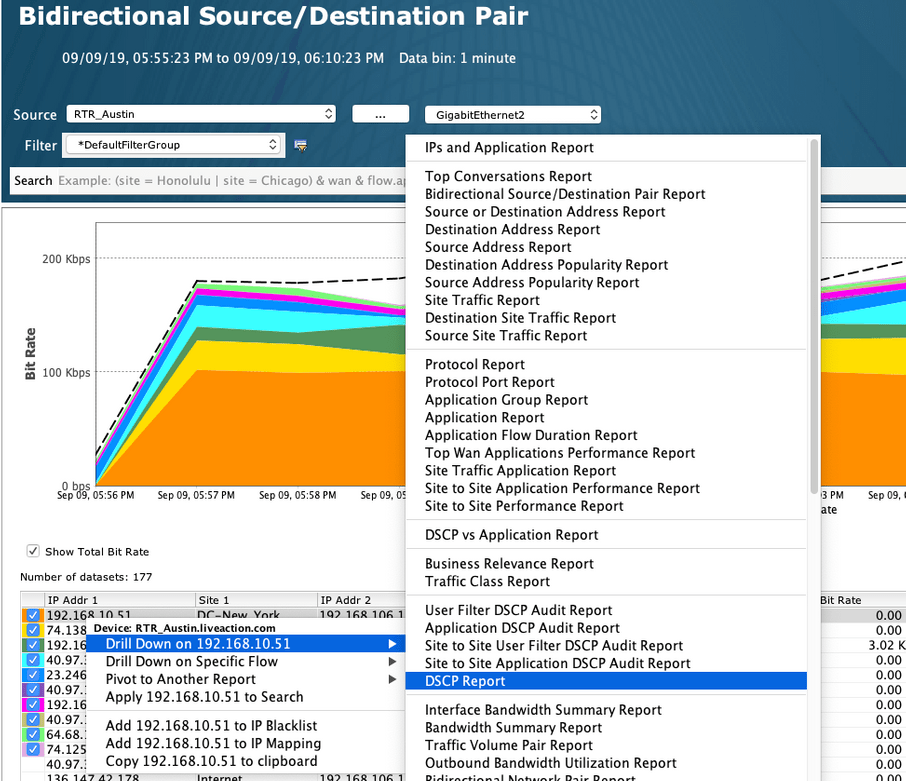
In this example, selecting Drill Down on 192.168.10.51 and then selecting DSCP report creates a DSCP flow report as a tabbed selection next to the Bidirectional Network Pair report. The drilled down DSCP report shows the DSCP values filtered on the IP address chosen from the previous chart. The Filter: IP designation is automatically added to the Tags and Filters configuration header of the flow report.

To drill down further, select the desired DSCP value and select another report. In this case, selecting the Drill Down on 0 and then selecting Source Country report will create a Source Country flow report as another tab, filtered by IP address and DSCP value. The resultant flow report will indicate both the Filter. IP and the Filter: DSCP in the Tags and Filters section of the flow report.
You can change report from a given flow report using the same report configuration parameters by right-clicking on a flow in the table and be selecting one of the other reports in the drop-down menu. Instead of using the Drill Down feature, which automatically filters the list, selecting a report will create a new unfiltered flow report as another tab. In this example, highlighting a flow and clicking on DSCP report will create another DSCP report as a second tab, this time with no filters.
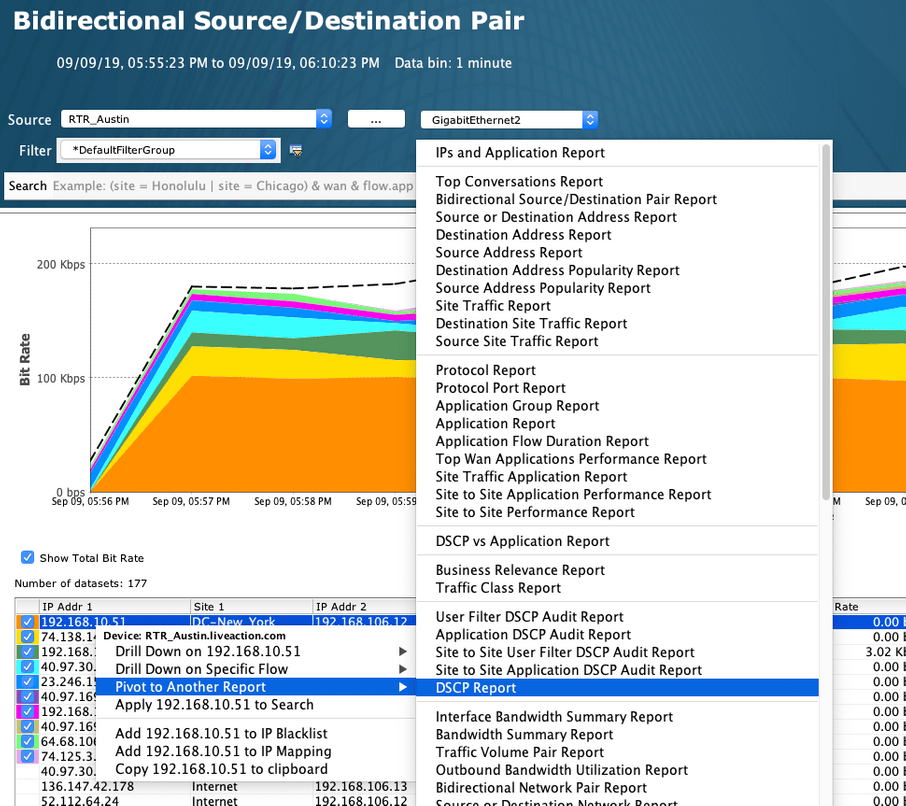
Since it is not a Drill Down on type report, LiveNX creates another DSCP tab containing a DSCP flow report that does not have an IP filter in the Tags and Filters section.
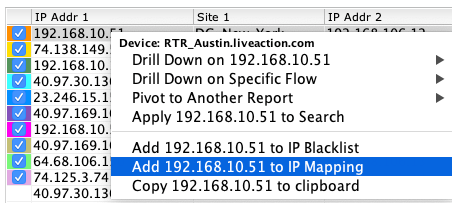
Right-clicking on an Address flow report allows three other features: Add to IP Blacklist, Add to IP Mapping, Copy to Clipboard.
• Add to IP Blacklist – right click on the desired IP address in an Address flow report and select Add to IP Blacklist to move this IP address to the blacklist stored in LiveNX. Details on the IP Blacklist can be found in Chapter 11 – Tools.
• Add to IP Mapping – right click on the desired IP address in an Address flow report and select Add to IP Mapping to bring up the Add IP Mapping dialog box. Details on the IP Mapping feature can be found in Chapter 11 – Tools.
• Copy IP Address to Clipboard – right click on the desired IP address in an Address flow report and select Copy IP Address to clipboard to copy the IP address to the client clipboard. In this example, using View by Application creates a Combined Application flow report using the selected flow.